News Update :

Formulir Kontak

Nama

Email *

Pesan *

Software Free

Tutorial Blogger

Tutorial Blackberry

Cara Pasang Yahoo Emoticon di Atas Kolom Komentar

Diposting oleh : Posted on Senin, 22 Oktober 2012 - 12:18 PM with 1 comment


Cara memasang Yahoo Emoticon di blog sangat mudah. Kita hanya menambahkan sedikit kode sebelum </body> dan setelah kode <p class='comment-footer'>. Tetapi sebelum saya menulis tentang langkah-langkahnya, alangkah baiknya saya jelaskan dulu sedikit mamfaat dari memasang Yahoo Emoticon di atas kolom komentar.

Mamfaat memasang Yahoo Emoticon di blog :

  1. Menarik minat pengunjung blog untuk berkomentar
  2. Visitors blog dapat mengungkapkan perasaanya setelah membaca postingan yang kita buat melalui gambar bergerak (Yahoo Emoticon).
  3. Menambah keindahan pesan di kolom komentar
  4. Dan masih banyak lagi mamfaat lainnya.
Cara pasang Yahoo Emoticon di blog atau Cara pasang Yahoo Emoticon di atas kolom komentar :
  • Login ke akun blogger sobat
  • Selanjutnya klik Menu Rancangan, pilih Edit HTML.
  • Kasih tanda Centang pada Expand Widget Templates.
  • Cari kode </body>, lalu paste kode di bawah ini di atas kode </body>
<script src='http://oom.blog.googlepages.com/smiley.js'  type='text/javascript'/>
  • Cari kode <p class='comment-footer'> (Kalau anda menemukan dua kode yang seperti ini, pilih yang kedua, lalu paste dibawahnya
    <b><img border='0' src='http://us.i1.yimg.com/us.yimg.com/i/mesg/emoticons7/21.gif'/>
    :))
    <img border='0' src='http://us.i1.yimg.com/us.yimg.com/i/mesg/emoticons7/100.gif'/>
    :)]
    <img border='0' src='http://us.i1.yimg.com/us.yimg.com/i/mesg/emoticons7/71.gif'/>
    ;))
    <img border='0' src='http://us.i1.yimg.com/us.yimg.com/i/mesg/emoticons7/5.gif'/>
    ;;)
    <img border='0' src='http://us.i1.yimg.com/us.yimg.com/i/mesg/emoticons7/4.gif'/>
    :D
    <img border='0' src='http://us.i1.yimg.com/us.yimg.com/i/mesg/emoticons7/3.gif'/>
    ;)
    <img border='0' src='http://us.i1.yimg.com/us.yimg.com/i/mesg/emoticons7/10.gif'/>
    :p
    <img border='0' src='http://us.i1.yimg.com/us.yimg.com/i/mesg/emoticons7/20.gif'/>
    :((
    <img border='0' src='http://us.i1.yimg.com/us.yimg.com/i/mesg/emoticons7/1.gif'/>
    :)
    <img border='0' src='http://us.i1.yimg.com/us.yimg.com/i/mesg/emoticons7/2.gif'/>
    :(
    <img border='0' src='http://us.i1.yimg.com/us.yimg.com/i/mesg/emoticons7/8.gif'/>
    :X
    <img border='0' src='http://us.i1.yimg.com/us.yimg.com/i/mesg/emoticons7/12.gif'/>
    =((
    <img border='0' src='http://us.i1.yimg.com/us.yimg.com/i/mesg/emoticons7/13.gif'/>
    :-o
    <img border='0' src='http://us.i1.yimg.com/us.yimg.com/i/mesg/emoticons7/7.gif'/>
    :-/
    <img border='0' src='http://us.i1.yimg.com/us.yimg.com/i/mesg/emoticons7/11.gif'/>
    :-*
    <img border='0' src='http://us.i1.yimg.com/us.yimg.com/i/mesg/emoticons7/22.gif'/>
    :|
    <img border='0' src='http://us.i1.yimg.com/us.yimg.com/i/mesg/emoticons7/35.gif'/>
    8-}
    <img border='0' src='http://us.i1.yimg.com/us.yimg.com/i/mesg/emoticons7/102.gif'/>
    ~x(
    <img border='0' src='http://us.i1.yimg.com/us.yimg.com/i/mesg/emoticons7/104.gif'/>
    :-t
    <img border='0' src='http://us.i1.yimg.com/us.yimg.com/i/mesg/emoticons7/66.gif'/>
    b-(
    <img border='0' src='http://us.i1.yimg.com/us.yimg.com/i/mesg/emoticons7/62.gif'/>
    :-L
    <img border='0' src='http://us.i1.yimg.com/us.yimg.com/i/mesg/emoticons7/14.gif'/>
    x(
    <img border='0' src='http://us.i1.yimg.com/us.yimg.com/i/mesg/emoticons7/24.gif'/>
    =))</b>
  • Klik Simpan.

Untuk melihat hasilnya, buka salah satu postingan sobat blogger. 

Download Adobe CS6 Activator 32 and 64 + Full KeyGen

Download All Adobe CS6 Activator 32 and 64 bit supported, Crack, Patch, Keygen and Serial Key. Good News ! Adobe CS6 All in one Activator Released. Simply Active Your All Adobe CS6 Product As You Like. No Serial Key is Needed.
Adobe CS6 All Product

Adobe All CS6 Product Activator:
Adobe CS6 All Product Activator Crack Patch
.::INSTRACTION::.
Install as "trial version" then activate! 
Do not use serials or other things.
If you have already used serials, you have to do a system restore before the 1st installation of Adobe CS6 (if not, activator won't work!).
Supported Adobe CS6 Products:
Adobe Photoshop CS6 - Extended (32-Bit & 64-Bit)
Adobe Media Encoder CS6 (32-Bit & 64-Bit)
Adobe Flash Professional CS6
Adobe Bridge CS6 (32-Bit & 64-Bit) 
Adobe Dreamweaver CS6
Adobe Audition CS6
Adobe Prelude CS6
Adobe SpeedGrade CS6
Adobe OnLocation CS6
Adobe Encore CS6
Adobe Device Central CS6
Adobe InCopy CS6
Adobe Contribute CS6
Adobe Fireworks CS6
Adobe InDesign CS6
Adobe Illustrator CS6 (32-Bit & 64-Bit) 
Adobe Flash Catalyst CS6
Adobe After Effects CS6 (64-Bit only)
Adobe Premiere Pro CS6 (64-Bit only)
Adobe All CS6 Product Patch:

.::INSTRUCTIONS::.
1. Install The Trial.
2. Copy Patch File To Installation Directory.
3. Click On Patch Button.
Enjoy....
Note: Win Vista/7 Users Must Run Patch File as Administrator.

Adobe cs6 Master Collection Patch  

Adobe CS6 master Collection Patch By- iOTA
Installation Note:
1. Place the patcher into the "Adobe" folder.
   a.) If you're using a 32 bit OS, you have to navigate into the "Program Files" folder
   b.) If you're using a 64 bit OS, you have to navigate into the "Program Files" folder
        to patch the program in 64 bit. If you're planning to use any 32 bit version
        program, you have to navigate into the "Program Files (x86)" folder as well to
        patch the corresponding files.
2. Choose the product you want to patch. The patcher will detect the subfolder for
      the chosen application automatically.
3. Press the iOTA-logo on top to let the patcher register the desired product.
4. Enjoy another nice quality release by b0ne$natcheR - THETA / iOTA!

This Patch Will Work with the Following Adobe Product:
Adobe Creative Suite 6 Master Collection (32-Bit apps only)
Adobe Creative Suite 6 Master Collection (64-Bit apps only)
Adobe Acrobat Pro X v10.1.3 (32-Bit)
Adobe Audition CS6 v5.0 Build 708 (32-Bit)
Adobe Bridge CS6 v5.0.0.399 (32-Bit)
Adobe Distiller X Professional v10.1.323 (32-Bit)
Adobe Dreamweaver CS6 v12.0 Build 5808 (32-Bit)
Adobe Fireworks CS6 v12.0.0.236 (32-Bit)
Adobe Flash Builder 4.6 Premium v4.6 (32-Bit)
Adobe Flash Professional CS6 v12.0.0.481 (32-Bit)
Adobe Illustrator CS6 v16.0.0 (32-Bit)
Adobe InDesign CS6 v8.0 (32-Bit)
Adobe Photoshop CS6 Extended v13.0 (32-Bit)
Adobe Prelude CS6 v1.0.1 (32-Bit)
Adobe After Effects CS6 v11.0.1.12 (64-Bit)
Adobe Bridge CS6 v5.0.0.399 (64-Bit)
Adobe Encore CS6 v6.0.0.492 (64-Bit)
Adobe Illustrator CS6 v16.0.0 (64-Bit)
Adobe Media Encoder CS6 v6.0.0.382 (64-Bit)
Adobe Media Encoder CS6 v6.0.1.31 (64-Bit)
Adobe Photoshop Extended v13.0 (64-Bit)
Adobe Premiere Pro CS6 v6.0.1 (64-Bit)
Adobe SpeedGrade CS6 (64-Bit)

Membuat Tulisan Berjalan di Blogger


Efek marquee artinya memberikan atau membuat kesan berjalan/bergerak pada suatu text. Efek Marquee atau tulisan berjalan umumnya di letakkan di bagian atas Header blog atau di bagian Footer Blog dan biasanya Efek marquee berisikan teks ucapan selamat datang. Untuk menampilkan tulisan berjalan pada blog, kita hanya menyisipkan kode HTML SEBELUM dan SESUDAH teks yang akan ditampilkan. Di bawah ini terdapat delapan efek marquee yang saya berikan, silahkan di copy paste di blog sobat.

Sebelum Melangkah ke Tahap yang semakin jauh
Silahkan Sobat tonton dulu hasil yang akan kita buat


Tempatkan kode Effect Marquee atau tulisan berjalan pada tempat yang diinginkan (Kolom Postingan atau Kolom HTML Java Script).

Effect Marquee atau Tulisan berjalan lambat
<marquee behavior="scroll" scrollamount="1" scrolldelay="32">Tulisan sobat disini</marquee>  

Effect Marquee atau Tulisan berjalan ke atas
<marquee behavior="scroll" direction="up" height="30"> Tulisan sobat disini</marquee>  

Effect Marquee atau Tulisan Zig-zag
<marquee behavior="alternate" direction="up" height="50px"><marquee direction="right"> Tulisan sobat disini</marquee></marquee>  

Effect Marquee atau Tulisan berjalan tetapi berhenti kalau dibayangi cursor
<marquee onmouseout="this.start()" onmouseover="this.stop()">Tulisan sobat disini</marquee>  

Effect Marquee atau Tulisan berjalan ke kanan
<marquee behavior="scroll" direction="right">Tulisan Tulisan sobat disini</marquee>  

Effect Marquee atau Tulisan berjalan dengan gambar
<marquee behavior="scroll"><img height="84" src="Url%20gambar%20yang%20akan%20ditampilkan" width="110">Tulisan sobat disini</marquee>  

Effect Marquee atau Tulisan dapat memantul
<marquee behavior="alternate" width="300"> Tulisan sobat disini</marquee>  

Effect Marquee atau Tulisan Bouncing around
<marquee behavior="alternate" direction="up" height="100" width="300"><marquee behavior="alternate" direction="right">Tulisan sobat disini</marquee></marquee>  
 

Cara Buat Judul Blog Berada di Tengah


judul blog,blog titile, how to center blog title, membuat judul blog berada di tengah

Judul Blog atau blog title berada di bagian header di sebelah kiri. Posisi Judul blog yang berada di sebelah kiri sebenarnya tidak mengurangi keindahan tampilan blog kita. Akan tetapi, tidak sedikit dari rekan-rekan sesama blogger yang ingin mengganti posisi judul blog mereka yang berada di sebelah kiri menjadi posisi center atau tengah. Oleh sebab itu, saya pun berinisiatif untuk membuat postingan tentang Cara membuat judul blog berada di tengah. Teknik yang akan saya berikan untuk menetengahkan judul blog ini saya dapatkan dari Forum Blogger. Teknik ini pernah saya coba sendiri, dan alhamdulillah berhasil. Semoga teknik ini juga berhasil diterapkan atau diimplementasikan di blog sobat blogger.

Cara Buat Judul Blog Berada di Tengah :

  • Login dulu di blogger.com
  • Klik tombol Design dan Edit HTML
  • Back Up dulu template sobat untuk berjaga-jaga
  • Kemudian sobat cari kode yang seperti ini :

.header-inner .Header .titlewrapper {
padding: 22px $(header.padding);
}

  • Kalau sudah ketemu kode yang seperti itu atau mirip seperti itu, hapus dan ganti dengan kode di bawah ini :

#header-inner {text-align: center ;}
.header-inner .Header .titlewrapper {
padding: 22px $(header.padding);
}

  • Klik Pratinjau atau Priview dulu, kalau berhasil baru klik save

Kalau teknik ini berhasil sobat terapkan di blog sobat. Jangan lupa tinggalkan pesan melalui kolom komentar yang tersedia. Akhir kata, Thanks for visiting Blogger Tutorial Blog. 

Download Windows 7 Loader v2.1.2 | x86And x64

Windows 7 Loader v2.1.2 | x86And x64 - (Software aktivasi windows) Ini adalah aplikasi loader yang digunakan oleh jutaan orang di seluruh dunia, terkenal untuk melewati Microsoft WAT (Windows Activation Technologies) dan ini bisa dibilang mengeksploitasi aktivasi Windows paling aman yang pernah dibuat. Aplikasi itu sendiri menyuntikkan (Sistem Berlisensi Kode Internal) SLIC ke dalam sistem Anda sebelum Windows boot, ini adalah apa bodoh Windows ke berpikir itu asli.


The things you might want to kno
  • works on 32-bit and 64-bit systems
  • compatible with Windows 7 SP1 and all system updates
  • compatible with all system languages
  • can be used to pre-activate Windows
  • allows you to install custom OEM information
  • features application integrity checking
  • supports hidden partitions and some complex setups
  • can work alongside Linux's GRUB or any other boot manager
  • works with VMware, VirtualBox and Hyper-V
  • works with most hard drive encryption software e.g. TrueCrypt or BitLocker
  • allows you to add your own certificates and serials externally
  • will install just the certificate and serial for users with an existing SLIC 2.1
  • features automated system profiling (The application matches everything up for you)
  • won't modify any system files
  • runs before Windows is launched
  • extra processes are run so you have nothing eating at your RAM
  • key parts of the loader are encrypted with a custom encryption
  • Every user has a unique version of the loader installed on his or her system


Supported operating systems
  • Windows 7 Ultimate
  • Windows 7 Ultimate E
  • Windows 7 Professional
  • Windows 7 Professional E
  • Windows 7 Home Premium
  • Windows 7 Home Premium E
  • Windows 7 Home Basic
  • Windows 7 Starter
  • Windows 7 Starter E
  • Windows Vista Ultimate
  • Windows Vista Business
  • Windows Vista Business N
  • Windows Vista Home Premium
  • Windows Vista Home Basic
  • Windows Vista Home Basic N
  • Windows Vista Starter
  • Windows Server 2008 Enterprise
  • Windows Server 2008 Foundation
  • Windows Server 2008 Standard
  • Windows Small Business Server 2008
  • Windows Storage Server 2008 Standard
  • Windows Storage Server 2008 R2 Essentials
  • Windows Server 2008 R2 Enterprise
  • Windows Server 2008 R2 Foundation
  • Windows Server 2008 R2 Standard
  • Windows Small Business Server 2011 Standard
  • Windows Small Business Server 2011 Essentials

Note: You must be running build 7600 or greater for Windows 7 and Windows Server 2008 R2.
Note: I don't recommend using any of the Windows 7 E editions.
Note: Windows 7 N editions will only be supported when OEM SLP serials leak.

-------------------------
Mau???
Download Windows 7 Loader v2.1.2 | x86 And x64 - Daz

Download Office Tab Enterprise Edition v.9.1 + Serial

Office Tab Enterprise Edition v.9.1 + Serial - Unlike Web browser--Firefox, Microsoft Office does not use tabs, so the users can't see at a glance all the documents they're working on, and it's not easy to switch between them. Office Tab solves the problem by putting tabs on Word, Excel, and PowerPoint. It is an Office add-in designed for Microsoft Word, PowerPoint and Excel, which will bring the tabbed browsing, editing and managing into user interfaces.


With Office Tab, you can easily open multiple documents to be contained within a single window, using tab for switching sets of documents. Office Tab includes three Office add-ins: Workbook Tabs for Excel, Document Tabs for Word and Presentation Tabs for PowerPoint.

What is Office Tab?
Office Tab includes three Office add-ins: Document Tab for Word, Workbook Tabs for Excel and Presentation Tabs for PowerPoint. Office Tab brings the useful Tabbed Document Interface into your Word, Excel and PowerPoint in no time, using tabs as a navigational widget for switching between sets of documents.

-------------------------
Mau???
Download Office Tab Enterprise Edition v.9.1

Download Windows 8 Pro Build 9200

Windows 8 Activator For Build 9200 | September 2012 - Windows 8 Pro succeeds Windows 7 Professional and Ultimate and is targeted towards enthusiasts and business users; it includes all the features of Windows 8. Additional features include operating as a Remote Desktop server, the ability to participate in a Windows Server domain, Encrypting File System, Hyper-V, and Virtual Hard Disk Booting, Group Policy as well as BitLocker and BitLocker To Go. Windows Media Center functionality will be available only for Windows 8 Pro, as a free "add-on."


This Works With Windows 8 Pro Build 9200 Tested And Approved.
Install:
  1. RUN AS ADMIN
  2. CLICK ON INSTALL/UNINSTALL WINDOWS 8
  3. When command Prompt open and Asked to PRESS Y/N JUST PRESS Y AND THAT'S
  4. ALL IT WILL ACTIVATE IT BY ITSELF( IT SHOULD SAY ACTIVATION SUCCESSFUL PRESS OK AND OK AGAIN, AND THEN ON COMMAND PROMPt IT WILL SAY THAT IT WILL RESTART LET IT RESTART BY ITSELF
  5. IT WILL THEN RESTART AND Voila ACTIVATED.
I Also Thinks it Works With All Version of Windows 8 but has not yet tested except for pro which prove that it works.
It also work on RTM VERSION of Windows 8 and with W.Z.T Release.

-------------------------
Mau???
Download Windows 8 Activator For Build 9200 | September 2012

Cara Membuat Scroll Box pada Blog Archive V.2


Sidebar dari blog ini berada di sebelah kanan blog post, Sobat blogger bisa lihat sendiri sebenarnya tanpa perlu saya jelaskan. Terdapat widget Arsip Blog disana yang saya setting dengan setting Dropdown Menu. Kalau kita menggunakan Kalu saya gunakan setting Flat List, maka arsip blog saya akan terlihat seperti gambar di bawah ini :

arsiv blog, archieve blog, blog archieve, scroll box blog archieve, scrolling blog arsip

Dan kalau saya atur secara Hierarchy, maka arsip blog saya akan tampil seperti ini:

arsiv blog, archieve blog, blog archieve, scroll box blog archieve, scrolling blog arsip

Kalau jumlah post atau artikel yang kita sudah publikasikan di atas 100 (Seratus) kemudian kita setting arsip blog kita dengan Hierarchy atau Flat List, tentunya widget arsip blog kita akan terlihat panjang. Solusi yang paling tepat untuk mengatasi tampilan widget arsip blog yang terlalu panjang adalah dengan cara Membuat Scroll Box pada Blog Archive. Bagimana cara membuatnya? Ikuti langkah-langkah berikut:

Cara Membuat Scroll Box pada Blog Archive :

  • Sign In di http://www.blogger.com/
  • Klik Menu Rancangan, lalu pilih Edit HTML.
  • Kasih tanda Centang pada Expand Widget Template
  • Cari kode berikut <div id='ArchiveList'>
  • Perhatikan kode sebelum kode tersebut!

arsiv blog, archieve blog, blog archieve, scroll box blog archieve, scrolling blog arsip

  • Hapus kode <div class='widget-content'>
  • Lalu ganti dengan <div class='widget-content' style='overflow:auto; height:200px'>
  • Klik Simpan Template

Tambahan :
200px adalah ukuran tinggi Scroll Box, Silahkan disesuaikan dengan tinggi Scroll Box yang sobat blogger inginkan

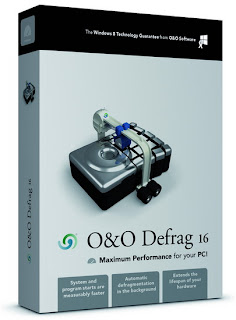
Download Defrag Pro Edition v.16.0 + Key


O & O DEFRAG PROFESIONAL EDITION 16.0 BUILD 151 FINAL

O & O DEFRAG PROFESIONAL EDITION 16.0 BUILD 151 FINAL adalah software DEFRAG hardisk   terbaik dari menurut beberapa kategori negara.  software yang bekerja baik dengan menempatkan File terfragmentasi dengan akuran dan kecepatan maksimum. banyak orang memang menggunakan software ini untuk program default DEFRAG hardisk dari pada menggunakan Software bawaan windows atau Utility lainnya. Penggunaan atau interface dari software ini sangat mudah di gunakan sehingga tidak menmbingungkan kita dalam penggunaan.. tertari.. cekidot.


Langkah Aktivasi
1. Install Software
2. Jalnkan KEMAKEY, Isikan nama dan Company terserah anda sobat
3. Lalu gunakan untuk register Program, 

Enjooyy full version


==> O & O DEFRAG PROFESIONAL EDITION 16.0.151 FINAL X86 Inc.Key  28 MB
==> O & O DEFRAG PROFESIONAL EDITION 16.0.151 FINAL X64 Inc.Key  33 MB
password : www.kuyhaa-android19.com

Sumber Link: www.kuyhaa-android19.com

Download Drive Genius Pro v.11.0.0.1136 + Patch


kali ini saya akan bagikan software untuk memperbaharui DRIVER kamputer sobat.. yups.. DRIVER GENIUS PRO 11.0.0.1136. namanya.. software yang mampu memperbaharui driver sobat yang mampu bekerja secara otomatis di mana saat komputer sobat online dan software ini akan bekerja.. memeriksa apakah terdapat driver yang OUT OF DATE, menghapus driver yang salah install di komputer sobat.. membackup dan merestore. driver.. yang jelas software yang di bandrol dengan harga $29.99 ini.. membuat sobat tak perlu repot-repot untuk mencari updatean driver.. tertarik..? cekidot.


Current Version: 11.0.0.1136
File Size: 12.7 MB
Operating System:
Windows 2000
Windows XP/XP x64
Windows Server 2003/Server 2003 x64
Windows Vista/Vista x64
Windows 7/7 x64
Windows Server 2008/Windows server 2008 x64
Windows 8/Windows 8 x64


langkah aktivasi
  1.  install driver genius, Lalu EXIT
  2.  BErikutnya,  copy DataBaseUnBlacklister_v11.xx.exe ke C: Program files\Driver-soft \Driver Genius, setelah itu jalankan PACTH, Klik PACTH
  3.  setelah selesai.. jalankan driver genius.. registrasi dengan SERIAL NUMBER yang telah tersedia..

enjoy  full version

Nb: Untuk menghindari ERROR saat UPDATE DRIVER DENGAN SOFTWARE ini, ANDA gunakan EASY HIDE IP, Atau software sejenisnya untuk Membuat FAKE IP Luar NEGERI.

==> DRIVER GENIUS PRO 11.0.0.1136 FULL TERBARU PATCH 13 MB
paswword : www.kuyhaa-android19.com

Sumber Link: www.kuyhaa-android19.com

Download Advanced SyistemCare Pro v.6.0.7.160 Full Key


ADVANCE SYSTEM CARE PRO FULL  TERBARU

RILLIS TERBARU. nie sob system UTILITY,  ADVANCED SYSTEMCARE PRO 6.0.7.160 FULL KEY, software utility yang banyak di buru orang juga.. kalo sobat pun salah satu pemburunya atau pun pengen mecoba ketangguhan software untuk membersihkan JUNK FILE, REGISTRY yang error.. percepat kinerja TENGTOP,.. cekidot..


LAngkah Aktivasi
1. Install Advance system care, Lalu pilih UPGRADE to PRO
2. Registrasi dengan SERIAL, Pilih serial yang Online atau yang OFFLINE
   Online=membutuhkan KOneksi internet, Offline Tidak perlu koneksi internet
3. Untuk menghindari BLACKLIST SERIAL, gunakan langkah di bawah ini

jangan lupa setelah aktivasi juga, untuk menghindari blok saat konek internet
klik start, kolom pencaria copas berikut ini : C:\WINDOWS\system32\drivers\etc
terus pada " hosts" pertama, edit with notepad, lalu paling bawah isikan berikut ini

127.0.0.1  http://www.iobit.com
 127.0.0.1    iobit.com
 127.0.0.1   98.129.229.186
 127.0.0.1   http://www.iana.org
 127.0.0.1   iana.org

lalu save.. enjoy. dah..


==> ADVANCED SYSTEMCARE PRO 6.0.7.160 FULL KEY 

Sumber Link: www.kuyhaa-android19.com

Windown 7 Manager v.4.1.6 Terbaru Full


WINDOWS 7 MANAGER 4.0.6 TERBARU FULL


Bagaimana dengan keadaan komputer sobat..? apakah marasa lambat..  padahal software instalan hanya sedikit.. ? nah.. kali ini saya akan memberikan software untuk membantu meningkatkan kinerja skomputer sobat.. yups.. windows 7 manager 4.1.6 . software POPULER yang mampu mengoptimalkan dan membatu miningkatkan kecepatan windows 7 sobat.. serta menghapus file-file yang di angggap JUNK/ sampah.. cek registry sobat yang tidak penting untuk di hapus atau di perbaiki. sehingga tidak memberatkan hardisk sobat. software dengan harga $39.95 itu sangat memiliki kemampuan yang wajib untuk sobat gunakan sebagai perangkat UTILITY baik, karena di perangkat ini, sobat akan di sediakan COUSTUMIZE system, FIREWALL, Security Folder, , merubah manufacture laptop anda sobat, merubah gambar logo di propertise komputer, Yang jelas, dengan software ini, windows 7 jadi lebih mudah di kendalikan, karena terdapat system system yagn dapat sobat andalkan sebagai privise komputer pribadi,  kalo sobat sudah ingin menggunakan software ini,, cekidot..


Information
All software and hardware information with a click of your system, see.
Optimizer
Optimize and speed up the clean registry, Startup Manager and ...
Cleaner
Free hard disk space by deleting files without content, repetitive and ...
Customization
Edit menus display settings to increase speed and efficiency
Security
Security and clean registry keys, passwords and personal information
Network
Network settings to optimize speed network connections


langkah aktivasi
1. install dulu windows 7 exe nya, ( kalo enggak, keygen tidak berfungsi)
2. baru jalankan keygen, pilih PATCH EXE
3. copy serial numberny
4. enjoy.. full version..


==> WINDOWS 7 MANAGER FULL 4.1.6 with KEYGEN 10 MB
password: www.kuyhaa-android19.com

Semoga bermanfaat guys

Sumber Link: www.kuyhaa-android19.com

Download TuneUp utilities 2013 V13.0.2020.14 + Keygen

Tuneup 2013 Versi 13.0.2020.14 Full Version
Download TuneUp utilities 2013  V13.0.2020.14 With Keygen, Serial Number SN, Patch, Product Key TuneUp 2013 Full Version. Free Download TuneUp utilities 2013 dengan Keygen dan cara menjadikan TuneUp Utilities menjadi Full Version, TuneUp 2013 + Keygen, Patch, Serial Number, Product Key, Free download Patch Tuneup 2013 Versi 13.0.2020.14 Full Version.

Buat kalian semua,pastinya sudah tidak asing lagi dengan software utilities yang satu ini? inilah TuneUp Utilities Versi 13.0.2020.14 Full Version untuk Anda semuanya.

TuneUp Utilities 2013 + Keygen - merupakan salah satu software utiliti yang sudah tidak di ragukan lagi kemampuan nya, dan sudah populer. Bahkan saya yakin kalian sudah pada tahu apa itu fungsi dari software ini. Software ini lebih dikenal dan dipercaya oleh para master untuk menjaga kinerja komputer mereka.

Yang sudah master saja memakai software ini masa kalian tidak ingin mengikuti jejak mereka demi kinerja komputer anda selalu prima dan terhindar dari sampah - sampah yang terkadang membuat crash system dan lemooot. Dengan menggunakan TuneUp Utilitieskomputer kita akan selalu di jaga kinerjanya agar tetap maksimal.

SCREENSHOT :

Tuneup 2013 Versi 13.0.2020.14 Full Version
Kilk Gambar untuk memperjelas
FEATURES :
  1. 1-Click Maintenance optimizes your PC in 5 minutes
  2. Disk Cleaner 2013 cleans over 150 programs
  3. Live Optimization 2.0 puts a stop to resource hogs
  4. Economy Mode extends battery life
  5. Over 30 helpful tools in one package
DOWNLOAD :
Cara Menjadikan TuneUp Utilities 2013 Full Version :
  1. Download File Trialnya terlebih dahulu melalui situs resmi tuneup 2013
  2. Download Patch nya.
  3. Selesai download, Install TuneUp 2013 sampai Complete
  4. Close/tutup semua tuneup yang berjalan/running dikomputer anda.
  5. Buka Patch - Klik "Patch"
  6. Masukkan Nama, Company Name, terserah diisi apa. - Klik OK terus.
  7. Patch registry successfully.
  8. Enjoy!
Semoga Bermanfaat. ^_^

Tutorial Other


© Copyright 2-Bersaudara 2015 | Design by Herdiansyah Hamzah | Editing by 2-Bersaudara.